


Through some backups, I recently re-discovered a folder with some high school/college projects that I thought had been lost to the sands of time. One of them was an early attempt at a small RPG written in Z80 assembly for the TI-86 graphing calculator. I know what you’re thinking -- what did I do wrong to be tortured in such a way?
At the time, the TI-86 was a consistent device for entertainment in classes for young slackers such as myself. I thought it would be fun to build a non-text based game, which meant I had to use assembly instead of TI-BASIC. It would be my first foray into writing anything at such a low level and it gave me a lot of great insights into low level programming that I still probably use today.
A Brief History of the Z80
Before we get into the meaty details, a little history. The TI-83/4/5/6 graphing calculator series used the Zilog Z80 microprocessor, an 8-bit based CPU introduced by Zilog back in 1976 and, remarkably, is still in production to this day for many embedded/consumer devices (including those aforementioned graphing calculators). The Z80 was software compatible with the previously popular Intel 8080 but extended and enhanced it in a couple important ways that propelled it to its eventual popularity. Outside of the TI graphing calculators it was used in such devices as the Gameboy and Gameboy Color.
Compiling the Source Code
Due to its popularity, there are a lot of tools out there for the Z80,
spanning decades of work. It took a little digging around but I was able to
find an assembler that worked on OSX (and other Unix based systems) called
zasm that is still being actively worked on today! It’s available as a
binary download or if you’re more homebrew inclined, I added a
formula to my personal homebrew repository that makes
installing it a cinch.
brew tap a5huynh/brew
brew install zasm
With zasm in hand, lets run the compiler on the source code and see what happens:
> zasm src/MiniRPG.asm -o dist

in file MiniRPG.asm:
1: #include "ti86.inc"
   ^ file "src/ti86.inc" could not be read:
     No such file or directory: file = "src/ti86.inc" (fd108)

assembled file: MiniRPG.asm
    54 lines, 1 pass, 0.0044 sec.
    1 error
Well, nobody said it was going to be easy.
The Case of the Missing Includes
It turns out I had been using an include file, ti86.inc, which I had not
backed up with the rest of my source code. These include files define RAM
and ROM functions/memory locations so that instead of writing a function
call like call 4AB1h, we can write call _runIndicOff. There are also
constants for things like different key presses and commonly used memory
locations.
To find this missing file, I went to the incredibly useful ticalc.org file archives to see if there are include files I could use and stumbled upon the Ultimate TI-86 Include File. A cursory look through the file showed me that it had all the missing symbols that the assembler would be expecting from an include file.
Let’s run it again and see what happens:
> zasm src/MiniRPG.asm -o dist/main.86p
assembled file: MiniRPG.asm
    3332 lines, 2 passes, 0.0542 sec.
    no errors
Perfect! Looks like zasm was able to assemble the source code without any
issues and created a small binary. Now that we have a binary to work with,
the next step is figuring out how to run the program.
Running the Code
Since I no longer have a TI-86 calculator on hand, the next best thing would be to find an emulator. Looking through the ticalc.org website, I was able to find archives for the cross-platform emulator Wabbit that supports emulation of the TI-83/4/5/6 series of calculators. It's a little over the top with a full-on skin of the TI-86 calculator and forces you to actually click on the image to type things out, but it works nonetheless.
Loading the output from zasm into the emulator lead to nothing. Turns
out, it was expecting a specific file format for the assembly program to be
packed into before it could successfully transfer and run the application.
The 86p File Format
This lead to a 🌟fun 🌟 detour through the 86p file format, a proprietary file
format for different equations/variables/graphs/programs for the TI-86.
There are no existing tools (to my knowledge) that allow you to pack/unpack
programs in this file format, so I whipped up a python script based on the
format specifications to analyze existing TI-86 binaries and a packer to
pack the final output of the zasm assembler into something that can be
transferred and run by the TI-86 emulator.
You can check out the pack & unpacker code here
For example, analyzing the final output of assembled and packed game would look like so:
> python scripts/unpack86.py dist/MiniRPG.86p
-- Header --
Signature:      0x2a2a544938362a2a | **TI86**
Signature:      0x1a0a00
Comment:        Packed by pack86.py
Data Size:      4322 bytes

-- Data --
Data Header:    (12, 4306, 18, 7, b'MiniRPG\x00', 4306)
Program Len:    4302
Program Type:   0x8e28
Checksum (in file):     0x8bf7
Checksum (calculated):  0x8bf7
This enabled me to dig into valid 86p files that I knew worked on the emulator and compare that with output I created with my packing script.
The 86p file format is broken into 3 parts. There’s much more detailed
documentation available from ticalc.org, but I thought it’d be fun to break
down a real-life example. Let’s first take a look at the header section:
2A 2A 54 49 38 36 2A 2A     **TI86**
               1A 0A 00     Magic Number
             <42 bytes>     Comment
              <2 bytes>     Length of the data section
The header always starts off with the same 11 bytes, **TI86** followed by
the magic number 0x1a0a00. This is followed by a comment section of
42 bytes, ASCII encoded. If the comment is less than 42 characters long,
the rest of the space is padded by null (0x00) bytes. And lastly, we have
2 bytes which indicates how large the “data” section will be.
The data section contains another header and embedded in it the program itself (which itself also has a header). The header of the data section is a bit more complex so I’ll break it down using a table. Note that the data section can also be used to store variables, equations, graphs, etc.
| # of Bytes | Description |
|---|---|
| 2 | Always 0x0c00 (12). |
| 2 | Length of the program data. |
| 1 | Data Type ID. |
| 1 | Length, in characters, of the variable name. |
| 8 | Variable name, padded w/ space (0x20) or null (0x00). |
| 2 | Length of the program data (again). |
Breaking down a real-life example generated by my packing code:
                  0C 00     Magic Number
                  58 05     Lenght of the program data.
                     12     Data Type (Program)
                     07     Length of the variable name
4D 69 6E 69 52 50 47 00     MiniRPG (variable name)
                  58 05     Length of the program data
Finally the program itself, which itself has a small header that encodes how large the ASM code is and the type of program. Since this file format is also used to backup programs you may have written on the calculator, the program type are different variations of ASM and TI-BASIC identifiers.
                  58 05     Program length.
                  8E 28     Program type.
                  .. ..     <program in ASM>
Putting it All Together
After all that 🌟fun 🌟 research into the file format and a little trial and error I was able to finally create a working toolchain that leads from source code to running program:
- Assemble the source code,
- Pack the generated binary into the appropriate file format,
- Transfer the file over to the TI-86 emulator,
- And finally run the program!
Below I embedded a video of the game running in all its full glory on the Wabbit emulator. There are a couple visual glitches and you can't really do anything except walk around the scene I created.
Nothing to phone home about, but I’m still impressed I was able to get a rudimentary rendering system and NPC conversational system together in Z80 assembly.
For Next Time
This was a fun nostalgia trip but now that I have a working toolchain it also gave me a bunch of ideas I want to try out for a more in-depth dive into Z80 assembly.
- Grayscale rendering
If you take a look at a closeup gif of the running game in Wabbit, you'll see that it oddly flashes due to the grayscale rendering, as seen below:
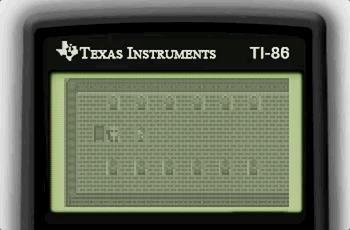
The TI-86 itself only renders in black and white and to accomplish grayscale rendering requires a bit of a hack where for each screen refresh we swap in/out screen memory to simulate grayscale. This would normally work on the actual hardware but the emulator is unable to correctly handle this particular method. There is another method that is supposed to be faster, more reliable, and should work with the emulator that I intend of implementing for the next article.
- Running on actual hardware
Unfortunately TI-86 graphic calculators have been discontinued and my old calculator has been lost to time. I plan on finding a working version to see if this will work on actual hardware as well.
- Run on different hardware
Due to the popularity of the Z80, it'd be interesting to see if I could get a basic version of this "game" running on other platforms, such as the GameBoy or GameBoy Color as well.
- Compilation from a different language
As 🌟fun 🌟 as it is working on Z80 assembly, it'd be interesting to see if I can build out a toolchain in C/Haskell/TypeScript/Rust that would be able to compile down to Z80 assembly.